本地部署的主要流程
1
2
3
4
5
6
7
8
9
10
11
12
13
14
15
16
17
18
19
| # 将镜像源设置为新的淘宝镜像源
npm config delete registry
npm config set registry https:
npm install -g yarn
mkdir vitepress
cd vitepress
# install vitepress
yarn add --dev vitepress
yarn vitepress init
# 需要回答几个简单的问题
# ./docs
# 一路默认
yarn docs:build
yarn docs:dev
http:
|

1
2
3
4
5
6
7
8
9
10
11
12
13
14
15
16
| D:\Desktop\vitepress>tree /f
vitepress
│ .gitignore
│ package.json
│ README.md
│
├─docs
│ │ api-examples.md
│ │ index.md
│ │ markdown-examples.md
│ │
│ └─.vitepress
│ │ config.mts
│
└─node_modules
|
部署到 Github Page
- Github 网站上进入 vitepress 仓库,设置,Pages,Build and deployment 选择 Github Actions
- 本地新建文件 vitepress.github\workflows\deploy.yml,内容为
1
2
3
4
5
6
7
8
9
10
11
12
13
14
15
16
17
18
19
20
21
22
23
24
25
26
27
28
29
30
31
32
33
34
35
36
37
38
39
40
41
42
43
44
45
46
47
48
49
50
51
52
53
54
55
56
57
58
59
60
61
62
63
64
| # 构建 VitePress 站点并将其部署到 GitHub Pages 的示例工作流程
#
name: Deploy VitePress Site to Pages
on:
# 在针对 `main` 分支的推送上运行。如果你
# 使用 `master` 分支作为默认分支,请将其更改为 `master`
push:
branches: [master]
# 允许你从 Actions 选项卡手动运行此工作流程
workflow_dispatch:
# 设置 GITHUB_TOKEN 的权限,以允许部署到 GitHub Pages
permissions:
contents: read
pages: write
id-token: write
# 只允许同时进行一次部署,跳过正在运行和最新队列之间的运行队列
# 但是,不要取消正在进行的运行,因为我们希望允许这些生产部署完成
concurrency:
group: pages
cancel-in-progress: false
jobs:
# 构建工作
build:
runs-on: ubuntu-latest
steps:
- name: Checkout
uses: actions/checkout@v4
with:
fetch-depth: 0 # 如果未启用 lastUpdated,则不需要
# - uses: pnpm/action-setup@v3 # 如果使用 pnpm,请取消注释
# - uses: oven-sh/setup-bun@v1 # 如果使用 Bun,请取消注释
- name: Setup Node
uses: actions/setup-node@v4
with:
node-version: 20
cache: yarn # 或 pnpm / yarn
- name: Setup Pages
uses: actions/configure-pages@v4
- name: Install dependencies
run: yarn install # 或 pnpm install / yarn install / bun install 33
- name: Build with VitePress
run: yarn docs:build # 或 pnpm docs:build / yarn docs:build / bun run docs:build
- name: Upload artifact
uses: actions/upload-pages-artifact@v3
with:
path: docs/.vitepress/dist
# 部署工作
deploy:
environment:
name: github-pages
url: ${{ steps.deployment.outputs.page_url }}
needs: build
runs-on: ubuntu-latest
name: Deploy
steps:
- name: Deploy to GitHub Pages
id: deployment
uses: actions/deploy-pages@v4
|
- 修改文件 D:\Desktop\vitepress\docs.vitepress\config.mts,添加 base,值为 Github 仓库的名称
- 完成
细节
参考:https://juejin.cn/post/7164276166084263972
- 页脚
- 上一篇/下一篇
- 最近更新日期(需要在网页端才能看到)
- 编辑此页
- 搜索,vitepress-plugin-pagefind 不支持中文,algolia 需要申请,故使用本地搜索,支持中文但不友好
- 代码高亮
侧边栏与首页显示

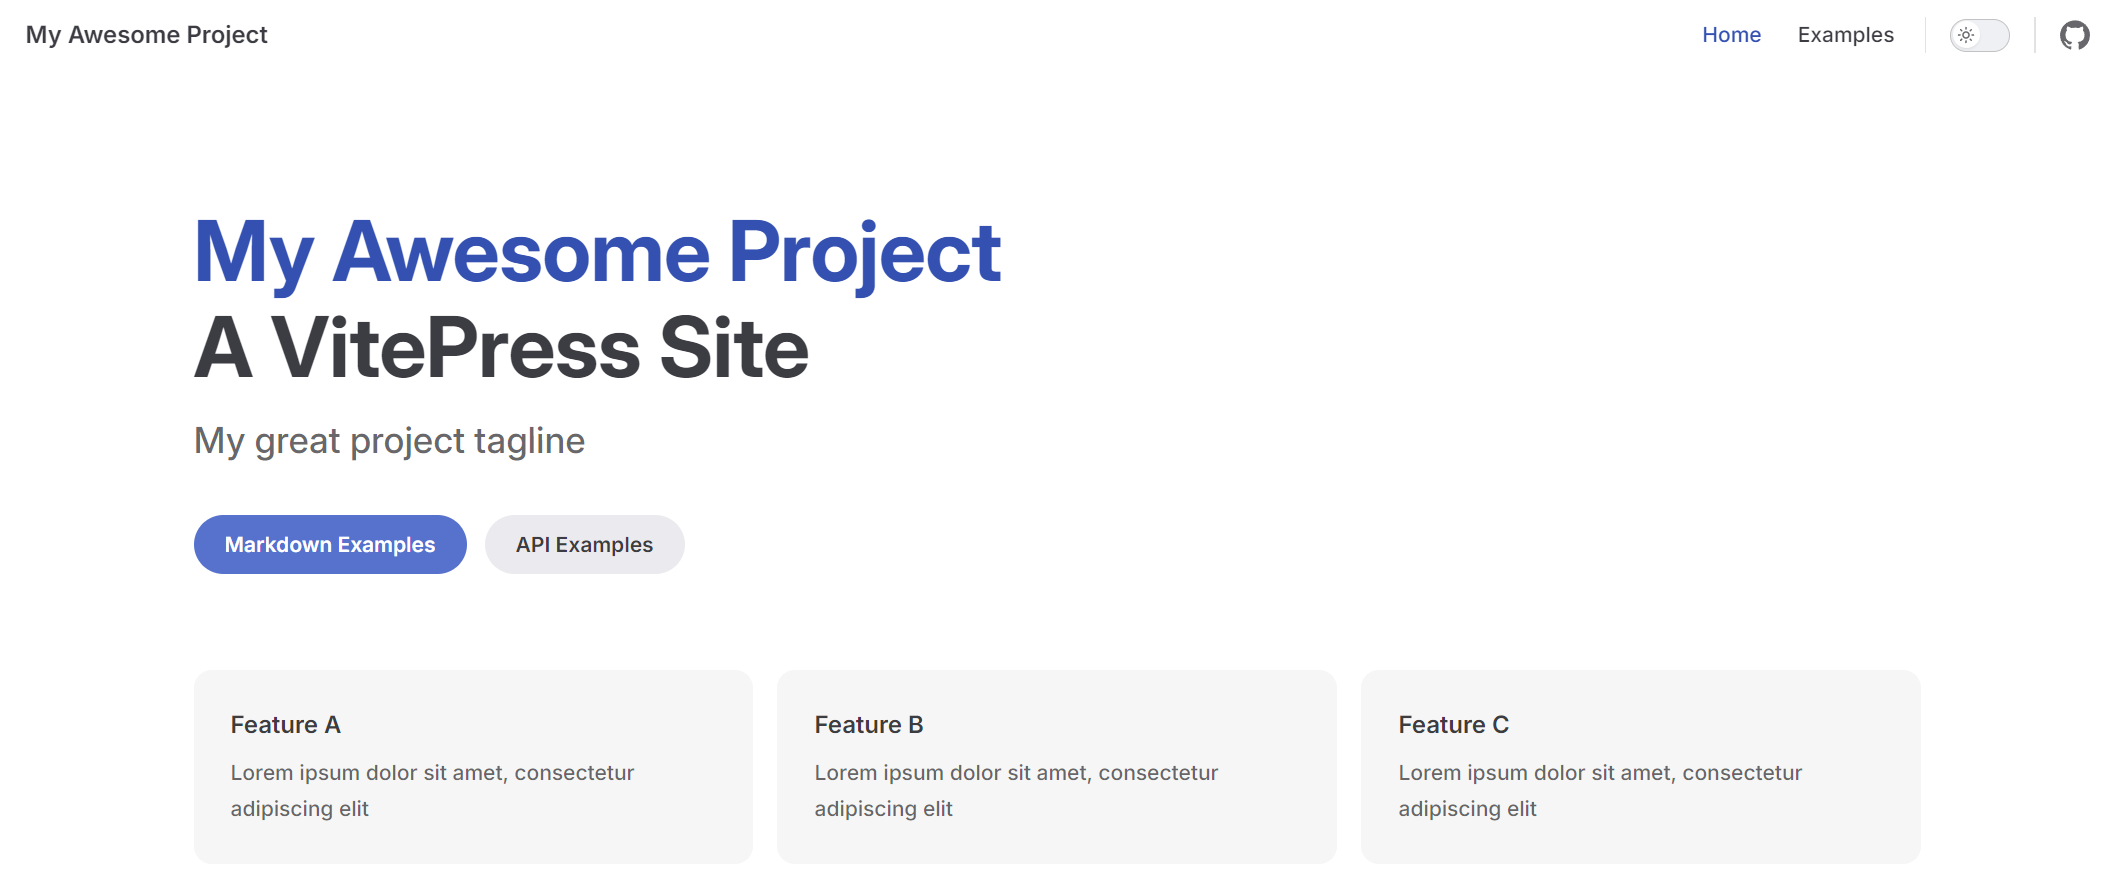
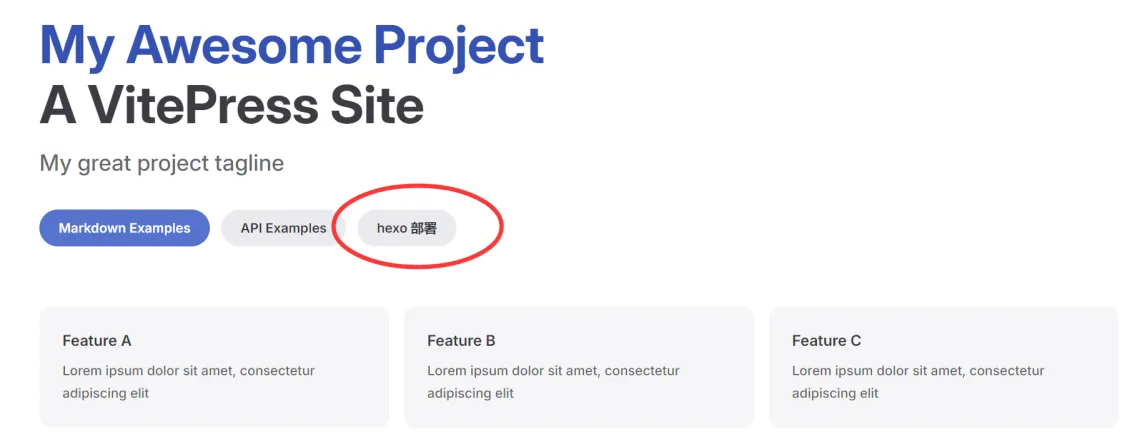
上面的部分是通过在 index.md 文件中添加下面代码实现的。
1
2
3
| - theme: alt
text: hexo 部署
link: /Hexo+Github Page+Github Action+语雀.md
|

上面的部分是通过修改config.mts文件实现的。
1
2
3
4
5
6
7
8
9
10
11
| sidebar: [
{
text: 'Examples',
items: [
{ text: 'Markdown Examples', link: '/markdown-examples' },
{ text: 'Runtime API Examples', link: '/api-examples' },
{ text: 'Hexo+Github Page+Github Action+语雀', link: '/Hexo+Github Page+Github Action+语雀.md' }
]
}
],
|
自带的搜索
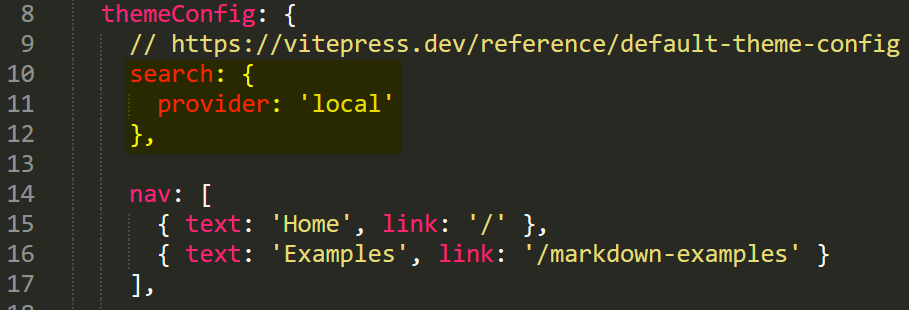
修改config.mts文件,添加下面代码即可
1
2
3
| search: {
provider: 'local'
},
|

Algolia 搜索
参考:https://www.skillgroup.cn/framework/vitepress/algolia.html
- Algolia 注册:首先,你需要申请一个 Algolia 账号。你可以在 Algolia DocSearch 官网 申请一个免费账号
- 登录:https://dashboard.algolia.com/users/sign_in;依次点击
Accept Application与Go to Application

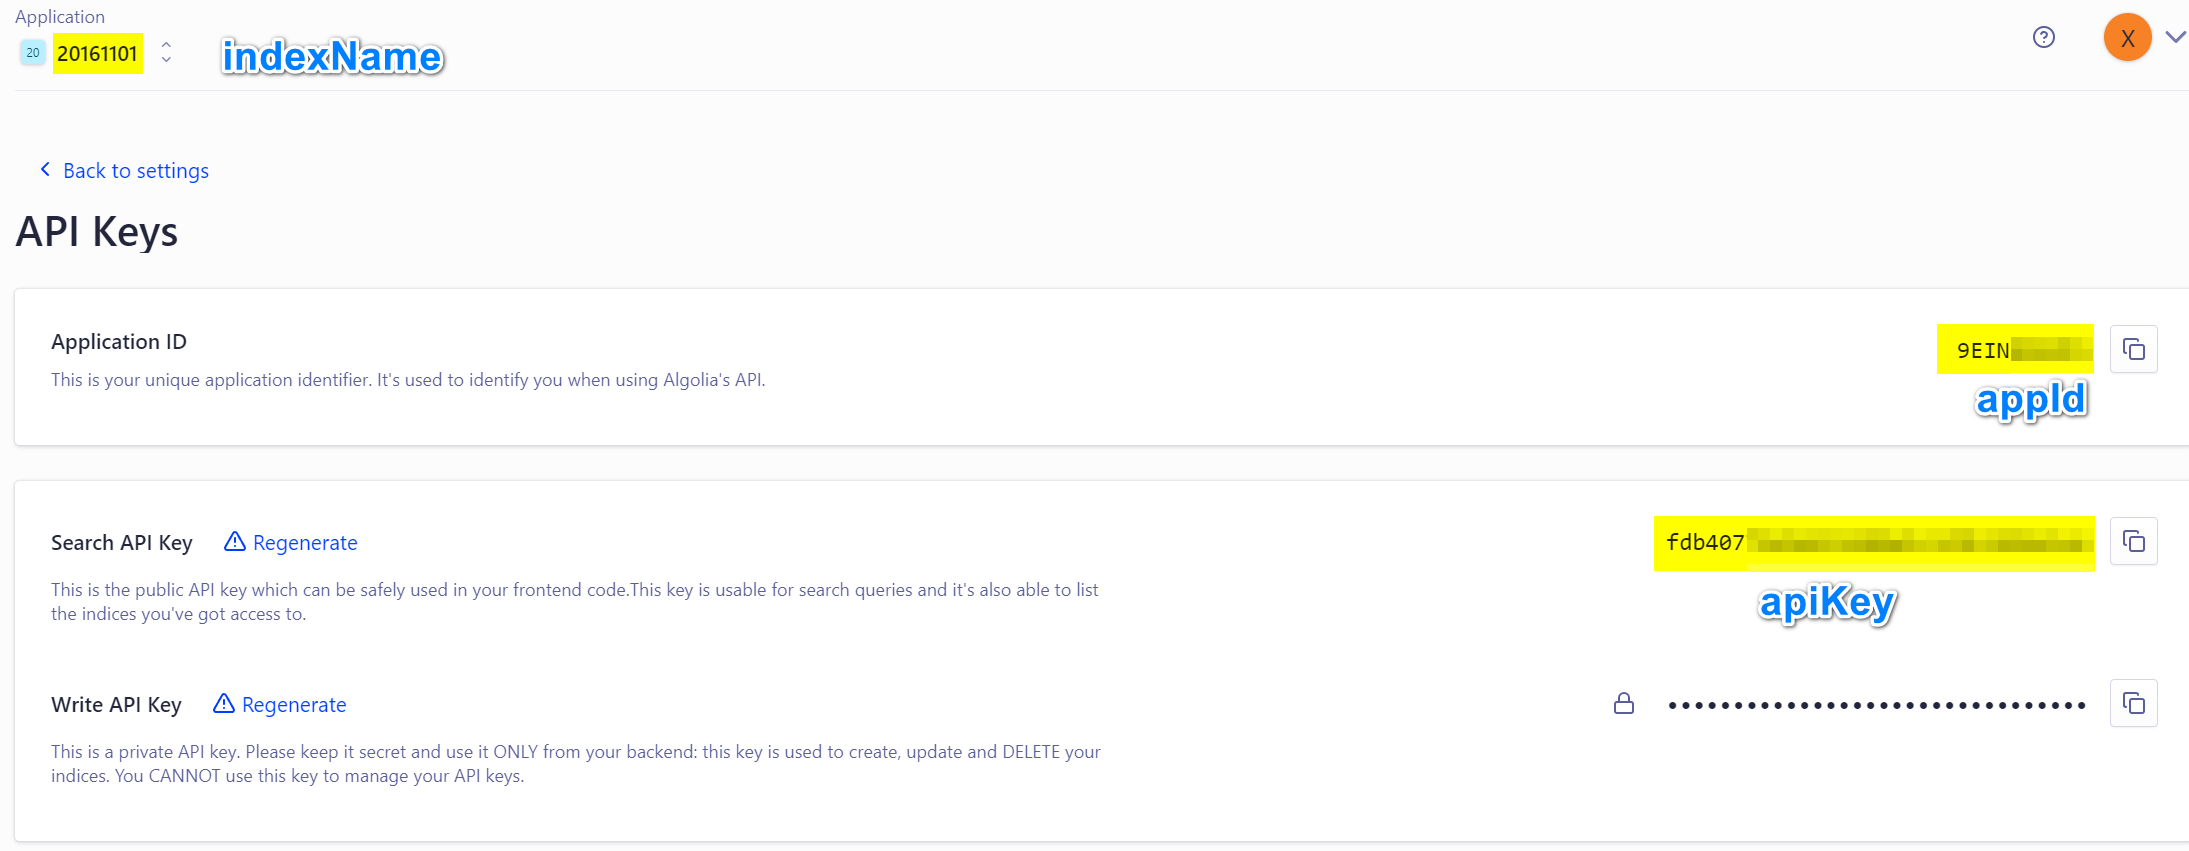
- 设置—API Keys—复制
<font style="color:rgb(35, 38, 59);">Application ID</font>与<font style="color:rgb(35, 38, 59);">Search API Key</font>备用

- 添加文件.vitepress/config.js,config.js 文件内容如下,需要修改
appId,apiKey,indexName三项
1
2
3
4
5
6
7
8
9
10
11
12
13
14
15
16
17
18
19
20
21
22
|
import { defineConfig } from "vite";
export default defineConfig({
themeConfig: {
search: {
provider: "algolia",
options: {
appId: "你的appId",
apiKey: "你的apiKey",
indexName: "20161101",
placeholder: "请输入关键词",
translations: {
button: {
buttonText: "请输入关键词",
},
},
},
},
},
});
|
- 完成
个人appId,apiKey,indexName
此处为语雀卡片,点击链接查看
可能错误的地方
关于文件产生路径
outDir:独自决定 bulid 产生的 html 放在哪里,其根目录是.vitepress 的父目录,默认为./.vitepress/dist
base:独自决定本地 index.html 的正确路径,以便本地可以正确双击预览 index.html
.yml 文件的path:base+path 决定 Github Page 的 index.html 路径
因此:无法同时保证双击本地 index.html 和 Github Page 远程都能正确显示,最极端的情况是本地文件夹和仓库远程名称不一样,实际上本地预览可以通过 yarn docs:dev 访问
以下设置可保证双击本地 index.html 正确显示
1
| base: '/vitepress-ob/docs/.vitepress/dist/',
|
以下设置可保证 Github Page 正确显示
1
2
| base: '/vitepress-ob/',
path: docs/.vitepress/dist,
|
或
1
2
3
| base: '/vitepress-ob/',
outDir: '../dist',
path: dist
|


